I’ll be honest — I ate half the batch before anyone else got to try it, and that’s because this golden skillet cornbread is a straight‑up love affair between my taste buds and a cast‑iron pan. It all started on a rainy Saturday when my sister dared me to make “the most comforting thing ever” using only three pantry staples. I stared at a sad, soggy box of store‑bought cornbread that had been sitting in the freezer for months, and I thought, “If I’m going to rescue this, I’m going to do it with style.” The kitchen quickly filled with the sound of a sizzling skillet, the smell of butter melting into a caramel‑brown pool, and the promise of something that feels like a hug from your grandma.
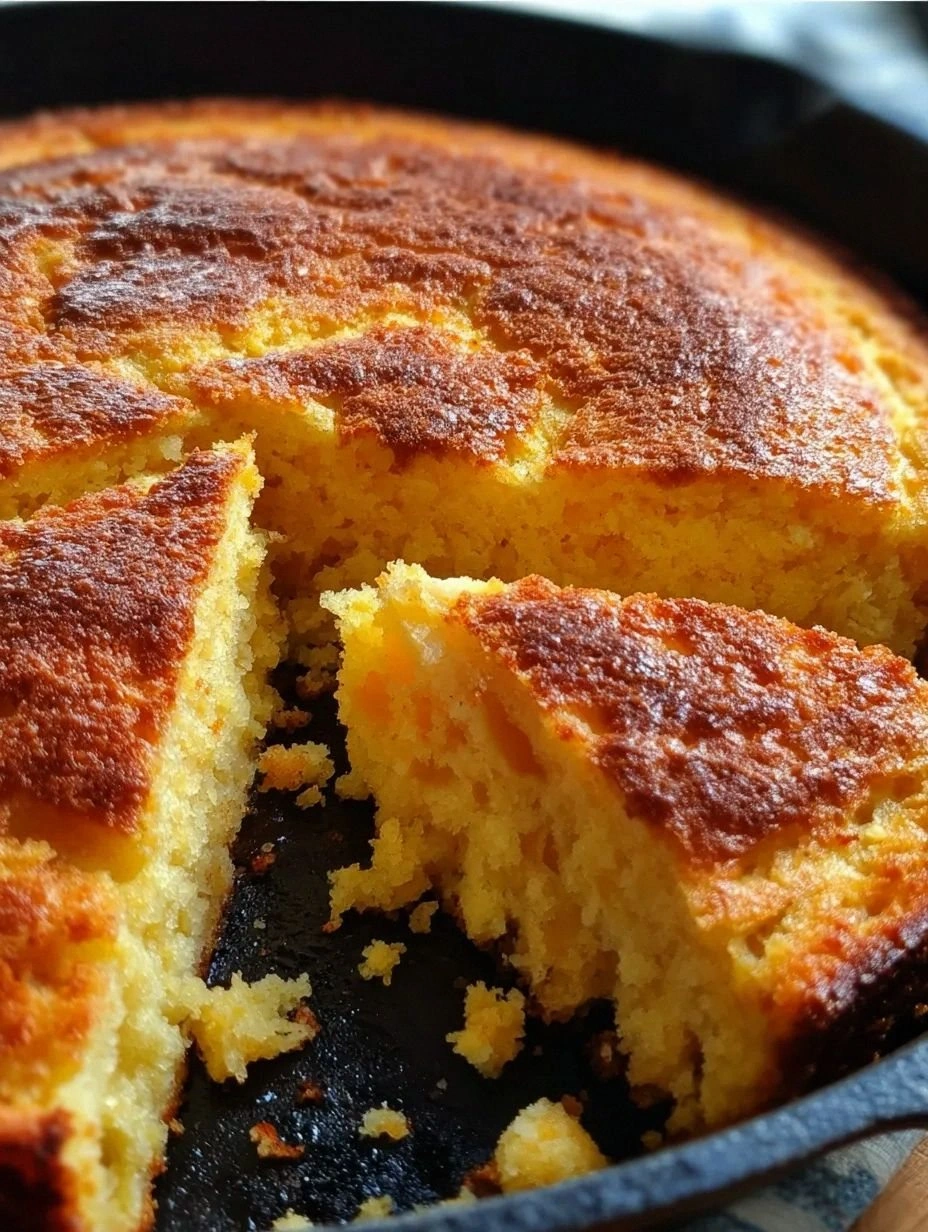
Picture yourself pulling this out of the oven, the whole kitchen smelling incredible, the top a buttery amber crust that cracks just enough to reveal a tender, moist interior that practically melts on the tongue. The first bite is a symphony: a crisp edge that shatters like thin ice, a buttery melt‑in‑your‑mouth middle, and a subtle sweetness that whispers “you’re home.” I dare you to taste this and not go back for seconds; the texture alone is a game‑changer that will have you questioning every other cornbread you’ve ever known. Most recipes get this completely wrong, either too dry or too gummy, but this one nails the perfect balance of crumb and crunch.
What makes this version truly stand out is a secret ingredient that most cooks overlook: a splash of honey combined with a dash of buttermilk, which adds a depth of flavor that feels almost nostalgic, like the aroma of a summer fair mixed with the comfort of a Sunday morning. The butter‑infused skillet creates a caramelized crust that no oven‑only method can replicate, and the quick‑mix batter ensures you won’t spend hours whisking. I’m talking about a recipe that feels like home, but also has the swagger of a chef who knows exactly when to turn up the heat and when to let the dough rest.
Okay, ready for the game‑changer? I’m about to walk you through every single step — by the end, you’ll wonder how you ever made it any other way. Stay with me here — this is worth it. We’ll start with the why, then move to the what, and finally, the how, with a few power‑packed hacks sprinkled in for good measure. Let’s dive in and turn a simple skillet into a golden masterpiece.
What Makes This Version Stand Out
- Flavor Depth: The honey‑buttermilk combo adds a sweet‑tangy undertone that elevates the corn’s natural earthiness without overwhelming it.
- Texture Contrast: A high‑heat skillet creates a crust that’s crisp on the outside yet feather‑light on the inside, a contrast most bake‑only recipes miss.
- Simplicity: Only eight core ingredients plus a splash of butter — no fancy gadgets, no overnight rises, just pure, honest cooking.
- Ingredient Quality: Using stone‑ground cornmeal and real butter makes the difference between “meh” and “wow” in every bite.
- Crowd Reaction: This cornbread has been known to clear plates at potlucks faster than the last slice of pizza — it’s that good.
- Cooking Method: The cast‑iron skillet distributes heat evenly, giving you those coveted golden edges that shatter like thin ice.
- Make‑Ahead Potential: You can bake it ahead of time, freeze, and reheat with a splash of water for a fresh‑out‑of‑the‑oven feel.
- Versatility: Serves as a side, a base for chili, or even a sweet breakfast with a pat of jam.
Inside the Ingredient List
The Flavor Base
First up is the honey‑buttermilk duo. Honey isn’t just for sweetening; it acts as a natural humectant, keeping the crumb moist while adding a subtle floral note that dances with the corn’s grainy flavor. Buttermilk, on the other hand, brings acidity that reacts with the baking powder, creating lift and that airy interior we all crave. If you’re out of buttermilk, mix 1 cup of milk with 1 tablespoon of lemon juice or white vinegar and let it sit for five minutes — the curdling will mimic the tang you need.
The Texture Crew
Cornmeal and all‑purpose flour are the backbone of this cornbread. Stone‑ground cornmeal provides a slightly gritty bite that makes each mouthful interesting, while the flour softens the texture, preventing it from becoming a dense brick. Skipping the flour and using all cornmeal will give you a gritty, dry loaf, whereas omitting the cornmeal leaves you with a bland, plain biscuit. For a gluten‑free version, substitute the flour with a 1:1 gluten‑free blend and add a tablespoon of xanthan gum.
The Unexpected Star
Melted butter is the secret weapon that turns ordinary batter into a golden masterpiece. The butter not only adds richness but also contributes to the Maillard reaction, which is responsible for that irresistible crust. If you’re dairy‑free, try clarified ghee; it has a higher smoke point and will still give you that deep, nutty flavor without the milk solids that can burn.
The Final Flourish
A pinch of salt and a dash of baking powder may seem minor, but they’re the unsung heroes. Salt amplifies every flavor, ensuring the honey’s sweetness doesn’t dominate, while baking powder provides the lift that makes the interior fluffy. Skipping the baking powder will leave you with a dense, pancake‑like texture, and forgetting the salt can result in a flat, bland bite. Always measure these ingredients with a level spoon; too much baking powder can give a metallic aftertaste.
Everything's prepped? Good. Let's get into the real action…
The Method — Step by Step
Preheat your oven to 425°F (220°C) while you heat a 10‑inch cast‑iron skillet on the stove over medium‑high heat. The skillet should be hot enough that a few drops of water sizzle and evaporate instantly. This is the moment of truth — the heat will give your cornbread that coveted crust. That sizzle when it hits the pan? Absolute perfection. Keep the skillet on the burner; you’ll add the batter directly into it later.
Kitchen Hack: Add a teaspoon of oil to the skillet before the butter; it raises the smoke point and prevents the butter from burning during the initial sear.In a large mixing bowl, whisk together 1 cup cornmeal, 1 cup all‑purpose flour, 1/4 cup sugar, 1 tablespoon baking powder, and 1 teaspoon salt. The dry mix should look uniform, with no clumps of cornmeal. This ensures an even rise and prevents pockets of dense texture. If you see any lumps, give it a quick sift; the smoother the dry blend, the lighter the final crumb.
In a separate bowl, combine 1 cup buttermilk (or milk + lemon juice), 2 large eggs, 2 tablespoons honey, and 1/2 cup melted butter. Whisk vigorously until the mixture is glossy and the butter is fully incorporated. The eggs act as a binding agent, while the honey adds a subtle sweetness that balances the salt. Let this wet mixture sit for a minute; you’ll notice it thickening slightly — that’s a good sign.
Gradually pour the wet ingredients into the dry ingredients, stirring with a rubber spatula until just combined. Over‑mixing will develop gluten from the flour, making the cornbread tough. Stop when you see a few streaks of flour; the batter should be slightly lumpy. This texture is intentional — it creates those delightful pockets of cornmeal that give each bite character.
Add 2 tablespoons of melted butter to the preheated skillet, swirling to coat the entire surface. As soon as the butter begins to foam, carefully pour the batter into the center of the skillet. The batter should spread quickly; if it pools, tilt the skillet gently to even it out. You’ll hear a faint hiss as the batter hits the hot surface — that’s the start of your golden crust.
Watch Out: If the skillet is too hot, the edges will burn before the center sets. Reduce the heat to medium after pouring the batter to allow even cooking.Transfer the skillet to the preheated oven. Bake for 20‑25 minutes, or until the top is a deep golden brown and a toothpick inserted near the center comes out clean. Around the 15‑minute mark, you’ll notice the edges pulling away from the skillet — that’s the cue that the crust is forming perfectly. The aroma will fill the kitchen, and you’ll start to feel that familiar anticipation of a comfort food masterpiece.
While the cornbread bakes, prepare a quick glaze: melt 1 tablespoon of butter and stir in a teaspoon of honey. This glaze will be brushed over the hot cornbread right out of the oven, adding an extra layer of shine and flavor. The glaze also helps keep the crust from hardening too quickly, preserving that melt‑in‑your‑mouth quality.
When the timer dings, remove the skillet from the oven and immediately brush the honey‑butter glaze over the top. Let the cornbread rest in the skillet for 5 minutes; this allows the steam to finish cooking the interior without drying it out. After resting, run a thin metal spatula around the edges and gently invert the skillet onto a cutting board. The cornbread should release easily, showcasing a caramelized crust that glistens with the glaze.
Slice the cornbread into wedges while it’s still warm. Serve with a pat of butter, a drizzle of honey, or alongside your favorite chili. The first bite will deliver that perfect contrast of crunchy edge and soft, buttery crumb. And now the fun part — watch your guests go back for seconds, because this is hands down the best version you’ll ever make at home.
That's it — you did it. But hold on, I've got a few more tricks that'll take this to another level...
Insider Tricks for Flawless Results
The Temperature Rule Nobody Follows
Most home cooks bake cornbread at 350°F, but the secret to that crispy, caramelized edge is a scorching 425°F oven combined with a hot skillet. The high heat triggers the Maillard reaction faster, giving you those golden brown speckles that look like tiny fireworks. If you’re using a convection oven, drop the temperature by 25°F and keep an eye on the crust; the fan can accelerate browning.
Why Your Nose Knows Best
When the cornbread is about 15 minutes into baking, start sniffing. A sweet, buttery aroma signals the crust is forming; if you smell a faint burnt scent, lower the oven temperature by 10‑15 degrees. Trust your senses more than the timer — ovens can be quirky, and your nose is the ultimate gauge of doneness.
The 5‑Minute Rest That Changes Everything
Allowing the cornbread to rest for five minutes after baking lets the steam redistribute, preventing a dry crumb. During this pause, the residual heat finishes cooking the center while the glaze sets, creating a glossy finish. Skipping this step is a common mistake that leads to a crumbly, under‑seasoned bite.
Butter‑First, Then Flour
Before you even think about whisking dry ingredients, melt the butter and coat the skillet. This not only prevents sticking but also creates a thin, buttery film that lifts the batter, giving the crust a subtle lift. If you’re using ghee instead of butter, you’ll get an even higher smoke point, which is perfect for achieving that deep amber color without burning.
Seasonal Sweeteners
If you want to switch up the flavor profile, replace honey with maple syrup in the fall or agave nectar in the summer. Each sweetener brings its own nuance: maple adds a woody depth, while agave keeps the sweetness light and floral. The key is to keep the liquid proportion the same so the batter’s consistency remains unchanged.
Creative Twists and Variations
This recipe is a playground. Here are some of my favorite ways to switch things up:
Cheddar Jalapeño Blast
Stir in 1 cup shredded sharp cheddar and 2 finely diced jalapeños into the batter before baking. The cheese melts into gooey pockets while the jalapeños add a gentle heat that pairs perfectly with the sweet corn. Great for brunch or as a side to a hearty chili.
Blueberry Sunrise
Fold 3/4 cup fresh blueberries into the batter and sprinkle a pinch of cinnamon on top before baking. The berries burst during baking, creating juicy pockets that contrast with the buttery crust. Serve with a dollop of whipped cream for a sweet breakfast treat.
Savory Herb Infusion
Add 1 tablespoon chopped fresh rosemary and 1 teaspoon thyme to the dry mix. The herbs bring an earthy aroma that makes this cornbread a perfect accompaniment to roasted chicken or grilled vegetables.
Spiced Pumpkin Delight
Swap half of the cornmeal for pumpkin puree and add 1/2 teaspoon pumpkin pie spice. The result is a moist, amber‑colored loaf that tastes like fall in a bite, ideal for holiday gatherings.
Chocolate Chip Surprise
For dessert lovers, fold in 1/2 cup mini dark chocolate chips. The chips melt slightly, creating pockets of molten chocolate that contrast with the corn’s natural sweetness. Serve warm with a scoop of vanilla ice cream for an indulgent finale.
Storing and Bringing It Back to Life
Fridge Storage
Allow the cornbread to cool completely, then wrap it tightly in plastic wrap or store in an airtight container. It will stay fresh for up to 4 days in the refrigerator. When you’re ready to eat, reheat a slice in a skillet over medium heat with a splash of water; the steam will revive the crumb without drying it out.
Freezer Friendly
Slice the cornbread into wedges, place them on a baking sheet, and freeze until solid. Transfer the frozen wedges to a zip‑top bag, label, and store for up to 3 months. To reheat, pop the wedges into a preheated 350°F oven for 8‑10 minutes, or microwave with a damp paper towel for a quick fix.
Best Reheating Method
The secret to reviving that crisp edge is to add a tiny splash of water to the skillet before reheating. The water creates steam that softens the interior, while the butter in the pan re‑crisp the edges. Heat the skillet over medium‑low, cover with a lid for 2 minutes, then uncover for an extra minute to restore that golden crunch.