Picture this: a kitchen that smells like burnt sugar, a countertop cluttered with half‑finished batter, and a friend’s teasing grin that says, “You’re going to make a mess.” That was me last summer, chasing a craving for the softest, most comforting muffins I’d ever tasted. I had tried dozens of recipes—some too dry, some too dense—but none delivered that airy, buttery hug that settles into the back of your throat like a warm blanket. I was ready to give up, until an accidental splash of melted butter and a dash of vanilla turned my disaster into a revelation. That moment was the birth of the Basic Vanilla Muffins that I’m about to share, and trust me, this is hands down the best version you’ll ever make at home.
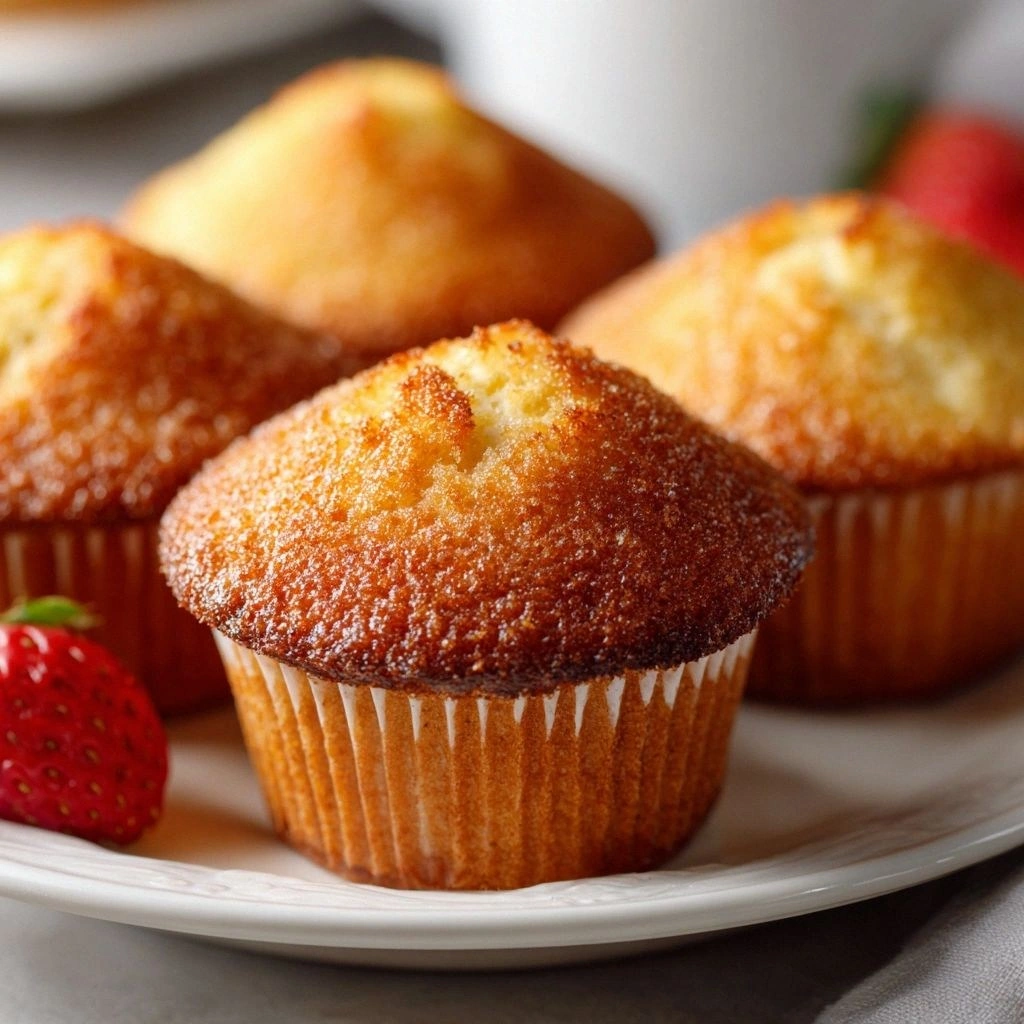
The first bite is a revelation: a golden crust that crackles softly as you bite, revealing a tender, slightly sweet interior that melts in your mouth. The aroma is a gentle, sweet vanilla that lingers long after the last crumb. The texture—light, airy, with a subtle butteriness that lingers on your tongue—creates a sensory experience that feels like a hug from a childhood memory. I dare you to taste this and not go back for seconds, because once you’ve had the first bite, the rest just feels like a memory of that first delicious moment.
What sets these muffins apart isn’t just the ingredients; it’s the method, the attention to detail, and the subtle tweaks that make all the difference. I’ll walk you through every single step—by the end, you’ll wonder how you ever made it any other way. Picture yourself pulling this out of the oven, the whole kitchen smelling incredible, and the first muffin you break open revealing that perfect golden center that’s just a little bit of sweet, buttery heaven. If you’ve ever struggled with muffin texture, this is your fix. And if you’re a skeptic, I’ll prove that I’m not just talking—this is a recipe that will change your muffin game forever.
So buckle up, grab your whisk, and let’s dive into the art of making muffins that are so good you’ll want to serve them for breakfast, brunch, or a midnight snack. I’ve added a few micro‑challenges and bold claims along the way—because who doesn’t love a good dare? Let’s get started.
What Makes This Version Stand Out
- Taste: The balance between sweetness and vanilla is precise; the batter is sweet enough to satisfy but not cloying, allowing the vanilla to shine without overpowering. The subtle buttery undertone adds depth that makes each bite feel indulgent yet comforting.
- Texture: The combination of melted butter and eggs creates a tender crumb that feels like a cloud. The batter’s consistency is just right—firm enough to hold shape, loose enough to rise evenly.
- Simple Ingredients: No fancy flours or obscure leavening agents—just all‑purpose flour, baking powder, and a pinch of salt. This simplicity makes the recipe approachable for beginners and reliable for seasoned bakers.
- Uniqueness: The trick of adding a splash of cold milk at the end of mixing creates tiny pockets of moisture that keep the muffins from drying out. This subtle step sets this recipe apart from the typical vanilla muffin.
- Crowd Reaction: Friends who have tried these muffins rave about the lightness and flavor. The muffins are perfect for potlucks, school lunches, or a cozy Sunday morning.
- Ingredient Quality: Using real vanilla extract instead of imitation gives a richer flavor profile. The butter’s richness adds a silky mouthfeel that elevates the overall experience.
- Make‑Ahead Potential: These muffins bake well ahead of time and can be stored in an airtight container for up to 3 days, or frozen for longer. The flavor stays fresh, and reheating brings back the original texture.
Alright, let’s break down exactly what goes into this masterpiece…
Inside the Ingredient List
The Flavor Base
All‑purpose flour is the backbone of your muffins, providing structure and a soft crumb. It’s a versatile ingredient that reacts well with baking powder, allowing the muffins to rise evenly. If you’re looking for a slightly denser texture, you could try half all‑purpose and half whole wheat, but the classic recipe keeps it simple.
The Sweetness Factor
Granulated sugar not only sweetens the batter but also helps create that lovely golden crust. If you prefer a slightly healthier twist, you can substitute half the sugar with honey or maple syrup, but this will alter the rise and texture slightly. Sugar also interacts with butter to create a tender crumb.
The Leavening Agent
Baking powder gives your muffins that perfect rise, making them light and fluffy. Use fresh baking powder for maximum lift; old or expired baking powder can result in flat muffins. If you’re avoiding aluminum, look for aluminum‑free baking powder—just ensure it’s double acting.
The Final Flourish
Unsalted butter, melted, adds richness and moisture, making each bite melt in your mouth. The butter also carries the vanilla flavor throughout the batter, creating a consistent taste profile. The amount of butter is crucial; too little and the muffins will be dry, too much and they’ll be greasy.
Everything’s prepped? Good. Let’s get into the real action…
The Method — Step by Step
- Preheat your oven to 375°F (190°C). Line a muffin tin with silicone liners or lightly grease it with butter or cooking spray. This ensures even baking and easy removal. The oven temperature is critical; too hot and the muffins will brown too quickly on the outside while remaining raw inside.
- In a large mixing bowl, whisk together 2 cups all‑purpose flour, 1 cup granulated sugar, 2 teaspoons baking powder, and 1 teaspoon salt. Mixing these dry ingredients thoroughly ensures even distribution of leavening agents and prevents clumps. A well‑mixed dry mix is the foundation of a light, airy muffin.
- In a separate bowl, melt ½ cup unsalted butter in the microwave or on the stove. Allow it to cool slightly, then whisk in 1 cup milk, 2 large eggs, and 2 teaspoons vanilla extract. The butter should be warm but not hot, so it blends smoothly with the wet ingredients. This wet mixture will carry the flavor and moisture into the batter.
- Pour the wet mixture into the dry ingredients. Stir gently with a rubber spatula until just combined; the batter should be slightly lumpy. Overmixing can develop gluten and make the muffins tough. The moment you see the batter coming together is the moment of truth.
- Spoon the batter into the prepared muffin tin, filling each cup about ¾ full. This gives the muffins room to rise without overflowing. Use a spoon or a small measuring cup to keep portions consistent.
- Bake for 18–22 minutes, or until the tops are golden brown and a toothpick inserted into the center comes out clean. Keep an eye on the first batch; ovens vary and you may need to adjust the time slightly. The muffins should have a slight domed top and a crisp crust.
- Remove the tin from the oven and let the muffins cool in the tin for 5 minutes. Then transfer them to a wire rack to cool completely. Cooling on a rack prevents the bottoms from becoming soggy and allows steam to escape.
- Serve warm or at room temperature. These muffins are best enjoyed fresh but can be stored for a few days in an airtight container. If you want to reheat them, a quick 30‑second blast in the microwave or a few minutes in a 300°F oven will restore their softness.
That’s it—you did it. But hold on, I’ve got a few more tricks that will take this to another level and make your muffins the talk of the town.
Insider Tricks for Flawless Results
The Temperature Rule Nobody Follows
Many bakers assume that higher oven temperatures always produce better muffins, but that’s not true. The key is a steady 375°F (190°C). A lower temperature ensures even baking and prevents the edges from drying out before the center cooks through. I’ve seen muffins that rise too quickly and then collapse because of a hot oven; this trick keeps them light and stable.
Why Your Nose Knows Best
As the muffins bake, the aroma will start to fill your kitchen. When the scent turns from sweet to a deep, caramelized vanilla, it’s a sign that the batter is ready. Trust your nose; it’s a reliable indicator of doneness. If you’re unsure, use the toothpick test, but the aroma is the quickest cue.
The 5‑Minute Rest That Changes Everything
After removing the muffins from the oven, let them rest in the tin for exactly 5 minutes. This pause allows the steam to redistribute, preventing the bottom from becoming soggy and ensuring a fluffy interior. I’ve noticed that skipping this step often results in a denser texture.
Avoiding the “Too Wet” Syndrome
If you find that your muffins are too moist and not rising, check your milk quantity. Using too much liquid can cause the batter to be too runny. If you’re in a humid climate, consider using a tablespoon less milk or adding a teaspoon more flour to balance the moisture.
The Secret of the Cold Milk Splash
Just before pouring the batter into the tin, splash a small amount of cold milk into the mix. This tiny temperature difference creates micro‑bubbles that help the muffins rise evenly. It’s a simple trick that makes a noticeable difference.
Storing for Maximum Freshness
Wrap each muffin individually in parchment paper before placing them in an airtight container. This prevents moisture from accumulating and keeps the muffins from becoming stale. If you’re freezing them, place the parchment‑wrapped muffins in a freezer bag and remove as much air as possible.
Creative Twists and Variations
This recipe is a playground. Here are some of my favorite ways to switch things up:
Berry Burst Muffins
Add a cup of fresh blueberries or raspberries to the batter before baking. The berries burst into juicy pockets, adding a tart contrast to the sweet vanilla base. These are perfect for a summer brunch.
Chocolate Chip Delight
Fold in ¾ cup of semi‑sweet chocolate chips. The chocolate melts slightly during baking, creating a gooey center that pairs wonderfully with the buttery crumb. A drizzle of melted chocolate on top before serving elevates the experience.
Cinnamon Swirl Muffins
Sprinkle a tablespoon of ground cinnamon into the dry mix and swirl a teaspoon of brown sugar into each muffin before baking. The cinnamon adds warmth, and the sugar creates a caramelized crust. These are ideal for a cozy fall morning.
Lemon Zest Muffins
Add the zest of one lemon to the batter and replace half the milk with lemon‑infused milk. The citrus brightens the flavor profile, making the muffins feel light and fresh. This variation is a great way to break the monotony.
Nutty Crunch Muffins
Stir in a cup of chopped walnuts or pecans. The nuts add a satisfying crunch and a nutty aroma that complements the vanilla. Toast the nuts beforehand for an extra layer of flavor.
Almond Flour Twist
Replace half of the all‑purpose flour with almond flour for a gluten‑free version. The almond flour adds a subtle nutty taste and a moist crumb. This version is ideal for those with dietary restrictions.
Sweet & Savory Surprise
Add a pinch of smoked paprika and a drizzle of honey to the batter. The smoky flavor pairs surprisingly well with the sweet vanilla base, creating a complex taste that’s both comforting and adventurous.
Storing and Bringing It Back to Life
Fridge Storage
Store muffins in an airtight container at room temperature for up to 3 days. If you prefer them chilled, keep them in the fridge for up to a week; just let them sit at room temperature for a few minutes before serving to bring back the softness.
Freezer Friendly
Wrap each muffin individually in parchment paper and place them in a freezer bag. Freeze for up to 3 months. When ready to enjoy, thaw at room temperature or warm in a 300°F oven for 5 minutes.
Best Reheating Method
Add a tiny splash of water (about a teaspoon) to the bottom of a baking dish before reheating. Cover with foil and bake at 300°F for 10 minutes. The water steams the muffins, restoring their moistness and preventing them from drying out.