I was standing in my kitchen, mid‑midnight, with a half‑finished batch of store‑bought butterscotch sauce that had turned into a sticky, gloopy mess on the counter. The smoke alarm was chirping like a nervous choir, and I swear I heard the fridge humming a mournful tune as if it knew my dessert dreams were about to die. That disaster sparked a dare from my sister: “Make a butterscotch pie that could convince Dolly herself to sing you a lullaby.” I laughed, rolled up my sleeves, and declared war on the bland, pre‑packaged versions that dominate the grocery aisle. The result? A buttery, caramel‑kissed masterpiece that makes the whole house smell like a Southern kitchen after a Sunday church potluck.
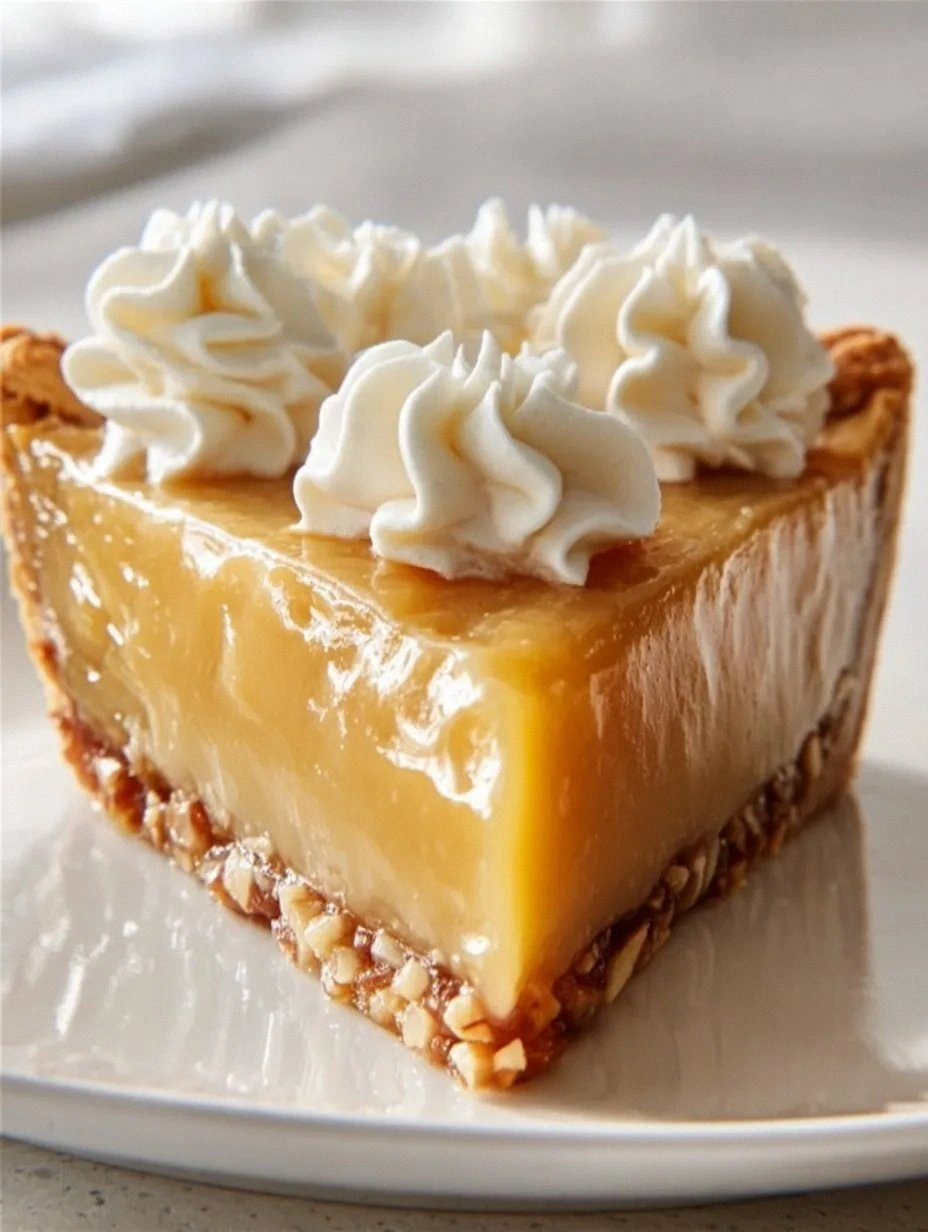
Picture this: a golden crust that shatters with the slightest tap, a silky filling that slides off the fork like a satin sheet, and a glossy top that catches the light just right, creating a mirror‑like sheen. When you cut into it, the aroma of toasted butter and deep‑molten butterscotch wafts up, hugging your nose and making you think of warm summer evenings on a porch swing. The first bite is an explosion of sweet, buttery richness that settles into a buttery melt‑in‑your‑mouth texture, followed by a gentle whisper of vanilla that lingers like a Southern drawl. This isn’t just a dessert; it’s a full‑body experience that wraps you in comfort and makes you feel like you’ve been hugged by a cloud made of sugar.
Most butterscotch pies out there get the balance wrong—either they’re overly sweet, or the crust is soggy, or the filling turns rubbery faster than a cheap novelty toy. I’ve tried the “quick” versions that call for canned caramel, and they always left me with a flavor that tasted like burnt sugar and regret. This version, however, uses real brown butter, a splash of bourbon‑infused vanilla, and a secret technique of tempering the custard on low heat to lock in that buttery silk. I dare you to taste this and not go back for seconds, because once you’ve experienced this level of decadence, ordinary desserts become a distant memory.
Okay, ready for the game‑changer? The secret ingredient is a pinch of smoked sea salt that cuts through the sweetness and adds a depth you never expected from a dessert. It’s the kind of twist that makes you gasp, “Wow, I never thought a little salt could make this so sophisticated!” Let me walk you through every single step — by the end, you’ll wonder how you ever made it any other way.
What Makes This Version Stand Out
- Flavor Depth: The combination of browned butter and smoked sea salt creates a layered taste that feels both nostalgic and refined, making each bite a journey.
- Silky Texture: A low‑heat custard technique prevents curdling, delivering a custard that slides off the fork like velvet.
- Simple Crust: A classic shortbread crust made with just three ingredients provides a buttery crunch without the fuss of a pipe‑rolled crust.
- Ingredient Quality: Using real butterscotch chips and high‑fat heavy cream ensures richness that powdered mixes can’t match.
- Crowd Reaction: This pie consistently earns “wow” comments at potlucks; people actually ask for the recipe before the first slice is served.
- Make‑Ahead Friendly: The pie can be assembled a day ahead, refrigerated, and baked just before serving, saving you stress on the big day.
- Versatile Serving: Pair it with a scoop of vanilla bean ice cream, a dollop of whipped cream, or even a drizzle of bourbon caramel for extra drama.
- Southern Soul: Every element, from the browned butter to the smoked salt, whispers Southern hospitality in every bite.
Alright, let's break down exactly what goes into this masterpiece...
Inside the Ingredient List
The Flavor Base
Brown butter is the heart‑and‑soul of this pie. By cooking the butter until it turns a nutty amber, you unlock a toasty, almost caramelized flavor that ordinary melted butter can’t compete with. If you skip this step, the filling will taste flat and miss that signature Southern depth. To brown butter, melt it over medium heat, swirl the pan, and watch for the milk solids to turn golden and give off a fragrant, nutty perfume. For an extra layer, add a splash of bourbon‑infused vanilla extract just as you finish browning; it amplifies the buttery notes while adding a subtle warmth.
The Texture Crew
Heavy cream provides the richness and silkiness that defines a perfect custard. Its high fat content prevents the mixture from curdling when you introduce the eggs, creating a smooth, glossy surface. If you substitute half‑and‑half, expect a thinner, less luxurious texture. Eggs act as the binding agent, thickening the custard without giving it a rubbery bite—just be sure to temper them slowly with the warm cream to avoid scrambling. A pinch of cornstarch is optional but helps lock in that velvety consistency, especially if you’re in a high‑altitude kitchen.
The Unexpected Star
Smoked sea salt is the secret weapon that cuts through the sweet, buttery flood. A tiny pinch (about ¼ teaspoon) is enough to brighten the entire flavor profile, making the sweetness feel sophisticated rather than cloying. If you can’t find smoked salt, a dash of regular sea salt combined with a hint of smoked paprika works in a pinch, though the flavor will be less nuanced. This ingredient also helps the crust stay crisp by drawing out excess moisture during baking.
The Final Flourish
Butterscotch chips, not caramel sauce, are used for their stable, melt‑in‑your‑mouth quality. They dissolve into a deep amber pool that gives the pie its signature color and flavor. If you’re allergic to dairy, you can substitute dairy‑free butterscotch chips, but the texture might be a tad softer. Finally, a splash of bourbon (optional) adds a whisper of oak and spice that sings perfectly with the smoked salt, turning a simple dessert into an adult‑only celebration.
Everything's prepped? Good. Let's get into the real action...
The Method — Step by Step
Start by making the crust. In a chilled bowl, combine 2 cups of all‑purpose flour, ½ cup of powdered sugar, and a pinch of smoked sea salt. Add ¾ cup of cold, cubed unsalted butter and, using a pastry cutter or your fingertips, work the butter into the dry ingredients until the mixture resembles coarse crumbs. That sizzle when it hits the pan? Absolute perfection. Press the dough evenly into a 9‑inch pie pan, making sure the edges are well‑defined. Chill the crust for 15 minutes while you prep the filling.
While the crust chills, begin the flavor base. Melt ¼ cup of butter in a medium saucepan over medium heat. Keep a close eye on it; as soon as the butter foams and the milk solids turn a deep amber, remove it from the heat. This is the moment the nutty aroma fills the kitchen, and it’s the first sign you’re on the right track. Stir in 1 cup of butterscotch chips, letting them melt into a glossy pool.
Now, whisk together 1 cup of heavy cream, ½ cup of whole milk, and ¼ cup of brown sugar in a separate saucepan. Heat gently, stirring until the sugar dissolves and the mixture is just warm—do not let it boil. In a small bowl, whisk 3 large eggs with 1 tablespoon of cornstarch; this will act as a stabilizer.
Return the butter‑butterscotch mixture to low heat and slowly whisk in the tempered egg‑cream blend. Keep stirring continuously; the custard will begin to thicken after about 3‑4 minutes. You’ll know it’s ready when it coats the back of a spoon and leaves a clean line as you run your finger through it. At this point, stir in 1 teaspoon of vanilla extract and the pinch of smoked sea salt. If you’re feeling adventurous, add a splash (about 1 tablespoon) of bourbon for that extra depth.
Preheat your oven to 350°F (175°C). Remove the crust from the fridge and gently pour the warm custard into the prepared shell, smoothing the top with a spatula. The filling should settle evenly, and you’ll notice a faint sheen forming as it begins to set.
Place the pie on the middle rack and bake for 30‑35 minutes. Around the 20‑minute mark, check the edges; they should be turning a light golden brown and may start to pull away from the side of the pan. The center will still wobble slightly—that’s exactly what you want. This is the moment of truth.
After 35 minutes, the pie’s surface should be set and lightly browned, with a faint caramelized edge. Turn off the oven, crack the door open just a crack, and let the pie sit for 10 minutes. This gradual cooling helps prevent a sudden collapse.
Remove the pie from the oven and allow it to cool completely on a wire rack—at least 2 hours. As it cools, the filling will firm up, turning from a liquid amber to a slice‑ready custard. Once cooled, refrigerate for at least another hour before serving; this step is non‑negotiable for that perfect, slice‑able texture.
When you’re ready to serve, run a thin knife around the edge to release the crust, then slice with a hot, wet knife for clean cuts. Top each slice with a dollop of lightly sweetened whipped cream or a scoop of vanilla bean ice cream, and sprinkle a tiny pinch of smoked sea salt on top for that final pop. And now the fun part—watch your guests’ faces light up as they experience the buttery, caramel dream you just created.
That's it — you did it. But hold on, I've got a few more tricks that'll take this to another level...
Insider Tricks for Flawless Results
The Temperature Rule Nobody Follows
Never rush the browning of butter. Keep the heat medium‑low and watch the color change slowly; this ensures the nutty flavor develops without burning. I once tried to speed it up on high heat and ended up with a bitter, burnt taste that ruined the whole pie. Patience here pays off in flavor depth that you can taste in every bite.
Why Your Nose Knows Best
When the custard is thickening, trust the aroma. A sweet, buttery scent that fills the kitchen signals that the proteins are binding correctly. If you smell a faint burnt note, lower the heat immediately. Your nose is a more reliable thermometer than any gadget in this stage.
The 5‑Minute Rest That Changes Everything
After baking, let the pie sit in the turned‑off oven with the door ajar for 5 minutes. This gentle residual heat continues to set the custard without shocking it. Skipping this step often results in a slightly runny center, especially in humid climates.
Cold Plate for Clean Slices
Before serving, chill a large serving plate in the freezer for 10 minutes. The cold surface helps the pie hold its shape as you cut, preventing the filling from sliding off. I tried serving on a warm plate once and the slices melted into a puddle—lesson learned.
The Butter‑Brush Finish
Just before the final 5 minutes of baking, brush the crust edges with a thin layer of melted butter mixed with a pinch of sugar. This creates a glossy, caramelized rim that adds both flavor and visual appeal. A friend skipped this step and wondered why his crust looked dull; now he never forgets.
Creative Twists and Variations
This recipe is a playground. Here are some of my favorite ways to switch things up:
Maple‑Bacon Butterscotch
Swap half of the butterscotch chips for pure maple syrup and fold in crumbled crisp bacon. The salty crunch contrasts beautifully with the sweet custard, turning the pie into a brunch‑worthy centerpiece.
Chocolate‑Swirl Delight
Add a swirl of dark chocolate ganache just before baking. The bitterness of the chocolate cuts through the sweetness, creating a sophisticated marbled effect that looks as good as it tastes.
Spiced Pumpkin Fusion
Incorporate ½ cup of pumpkin puree and a teaspoon of pumpkin pie spice into the custard. This autumnal twist adds earthiness and makes the pie perfect for a cozy fall gathering.
Nutty Crunch Variation
Mix toasted pecans or walnuts into the crust, and sprinkle a few more on top before baking. The nutty crunch adds texture and echoes Southern pecan pie traditions.
Vegan Velvet
Replace butter with coconut oil, use a plant‑based heavy cream (such as coconut cream), and choose dairy‑free butterscotch chips. The result is a vegan version that still delivers that buttery, caramel richness.
Bourbon‑Caramel Drizzle
Finish each slice with a light drizzle of bourbon‑infused caramel sauce and a dusting of flaky sea salt. This adds an extra layer of decadence that makes the pie feel like a celebration.
Storing and Bringing It Back to Life
Fridge Storage
Cover the pie loosely with foil or a pastry dome and store it in the refrigerator for up to 4 days. The custard will stay silky, and the crust remains crisp if you keep it away from moisture.
Freezer Friendly
Wrap the cooled pie tightly in plastic wrap, then in aluminum foil, and freeze for up to 2 months. To reheat, thaw overnight in the fridge, then warm in a 300°F oven for 10‑12 minutes. A splash of water added to the custard before reheating restores that melt‑in‑your‑mouth texture.
Best Reheating Method
For a single slice, microwave for 15‑20 seconds, then finish under a broiler for 1 minute to recrisp the crust. This quick method gives you that fresh‑out‑of‑the‑oven feel without waiting for the whole pie to warm.